How to sharpen a knife correctly. Sharpening kitchen knives at home to the point of cutting a hair - method and necessary equipment
Any knife made from the best steel or ceramic will become dull with use over time. This makes it more difficult for the housewife to prepare food, increasing the time and effort expended; sometimes a dull knife slips and causes injury.
To avoid such situations, you can use simple devices that provide instant editing of the blade to constantly maintain a sharp state. Also, sharpening kitchen knives should be repeated periodically - this can be done at home using simple tools.
Having mastered the technique, you will not only please the hostess on March 8 and other days, but you will also be able to greatly surprise your guests (if there is nothing else) by demonstrating at the table a knife capable of cutting hair. This is the level of sharpness of a kitchen knife that can be achieved if you know how to properly sharpen a knife using simple, inexpensive tools.
Sharpening a knife correctly is not the most difficult thing, the main thing is to listen to the recommendations
What knives can be sharpened
You can sharpen all types of kitchen knives - first of all, it depends on the equipment. Professional electric sharpening machines sharpen European, Japanese (single-sided), serrated (with a wavy surface), chopping, hunting, tourist, and ceramic knives with any sharpening angle.
You can effectively sharpen a knife at home if you have simple sharpening stones and follow the technology to the point of cutting a hair, which is more than enough when used in the kitchen.

Unfortunately, not all knives can be sharpened well.
Some types of knives are made using modern technologies with the cutting edge coated with a special wear-resistant compound that provides a self-sharpening effect. Sharpening kitchen knives of this type erases the special coating and the knife loses its advantages - naturally, such models cannot be sharpened.
Blade sharpening angle
The sharpening angle of a knife is the deviation between the line of symmetry of the blade and the plane of its cutting edge.
The sharpness of the blade and its durability depend on this value: the smaller the sharpening angle, the sharper the blade, but it wears off faster.
A larger knife sharpening angle reduces the sharpness of the cutting edge, but increases the duration of its operation.
Kitchen types for everyday cutting of products have sharpening angles from 20 to 30 degrees, ultra-sharp medical scalpels are sharpened at an angle of 10 - 17 degrees, hunting knives, kitchen home hatchets for chopping meat with bones and cleavers have a sharpening angle of 25 - 35 degrees.
To know at what angle to sharpen any knife, the blade is inserted into the scissors and the blades are compressed so that their tip is in close contact with the cutting edge of the knife. The angle at which the blades of the scissors will be moved apart is the sharpening angle.
Musat
Musat is a device with a handle and a rod 20–25 cm long, resembling a round or oval faceted file made of diamond-coated metal, hard steel or ceramics. The surface of the metal rod along the axis is covered with small grooves; ceramics have a less relief structure.
Musat is used for regular daily finishing and grinding of the working edge of knives, which helps maintain the sharpness of their cutting edges.

Musat is not suitable for all types of knives, only for models with a certain steel hardness
The main condition for using musat is the proper production of cutting edges and the hardness of the knife steel is less than 60 units. Musat allows you to straighten the smoothing or bending of the cutting edge on hard surfaces.
Operating rules
For inexperienced homeowners, sharpening with musat looks like this:
- Musat is taken in the left hand and rests its sharp end against a wooden surface at an angle of 25-30 degrees.
- The knife in the right hand moves from top to bottom in an arc towards the exit, the movements are repeated with little effort several times on each side of the blade.
- At the final stage of finishing, the force is reduced, after work the musat is washed with water and hung to dry on the hook of the handle.
A generally accepted method for checking the quality of sharpening is to cut a sheet of paper - if you can draw sinuous lines on it or cut thin strips, then the sharpness of the blade is very high. You can check the razor sharpness on the hair of your hand - a sharply sharpened blade easily cuts hair.
Sharpening stones
When deciding how to sharpen a knife, many first consider sharpening stones with varying degrees of abrasiveness. Modern whetstones have two sides - when using abrasive stones, the side with a coarse-grained structure is used at the beginning, and at the end of sharpening they switch to the fine grain of the other side.
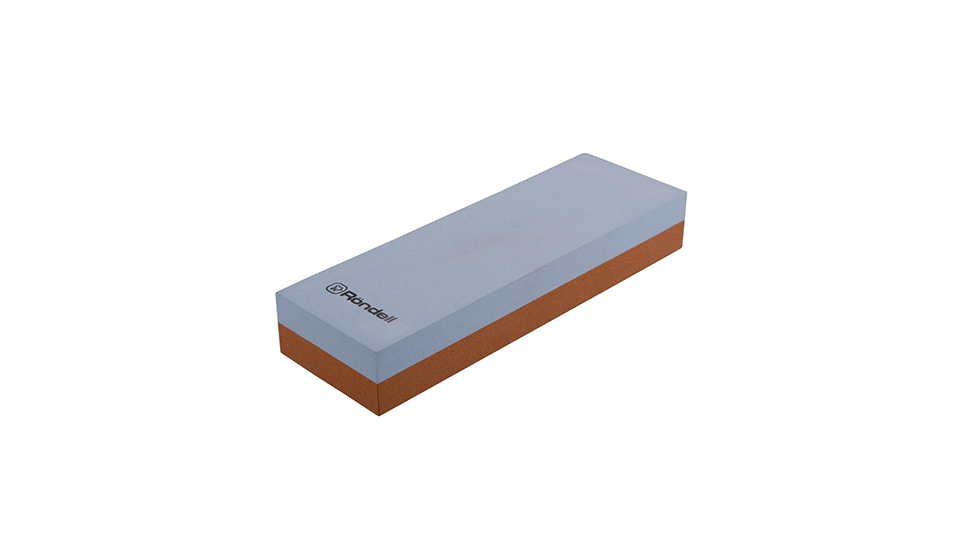
The whetstone is a classic option for standard kitchen knives
Sharpening rules
Before and during work, the bars are moistened with water or a soap solution - this is necessary to clean the pores of the bar from metal dust and its surface from spent suspension, to improve the sliding of the blade (many modern types do not require pre-treatment with water). The operating rules described in the instructions for the whetstone will help you know how to sharpen a kitchen knife.
- Wet the stone with water and add a drop of dishwashing liquid on top.
- We place the block on a flat surface, preferably one with a slight relief (not a planed board) for better grip.
- Apply the knife to the surface of the stone at the desired angle.
To set the angle, you can use a regular sheet of paper, folded several times, in this case you can get a final sharpening angle for the blade of 22.5 degrees (obtained by folding the sheet 90 degrees twice). We apply a sheet of paper with the resulting angle and a knife to the block, trying to remember the resulting slope.
- We place the knife at the beginning and across the block, while the end of its handle should be at the very edge of the block, and with a little effort we slide the blade along the block in an arc in the direction of cutting. To more firmly fix the sharpening angle, you can support the blade with your second hand. The movement is repeated 40 - 50 times, then the side and direction of movement change.
- If an edge with burrs appears along the entire length of the blade, you should stop sharpening on the coarse-grained side of the whetstone and move to the fine-grained side. The sharpening operation is repeated, at the end the pressure on the blade is reduced.
- After processing the knife on a coarse-grained block, you can polish it on musat.
- At the end of the work, the bars are washed under running water.
If desired, you can get a razor sharp knife. For this operation, genuine leather (a fragment of a leather belt) and abrasive paste (GOI, Dialux) are used. The paste is applied to the belt and a knife is passed along it repeatedly at the desired angle, with the movement opposite to the cutting direction.
Sandpaper

Sandpaper is the most economical option for maintaining a sharp knife.
The sharpening process using sandpaper is no different from sharpening stones. You can even make an improvised block out of it by gluing or taping sandpaper to a wooden block: coarse-grained sandpaper is fixed on one side, and fine-grained sandpaper on the other.
Mechanical sharpener

Similar sharpeners are the most convenient way to sharpen a knife at home
The standard design of mechanical sharpeners for kitchen knives is an oblong body consisting of a handle for holding and several slots with sharpening discs for blades of different degrees of sharpening. The sharpening angle when using it is constant and optimal for frequently used kitchen knives.
Another option for a manual mechanical sharpener is a roller knife, which has only one sharpening groove in the body with mechanical rollers.
Sharpening set
The main task when sharpening and straightening knives is setting the exact angle. To achieve this task, a wide range of mechanical designs of grinding devices have been developed.
Some models consist of a base and fasteners for a knife blade, the sharpening stone is attached to a guide rod. When working, it moves along the blade at the set angle, then the knife turns over. The set is equipped with different-grained stones - this allows you to straighten the geometry of the blade and polish it.

The sharpening set contains components for sharpening a knife in disassembled form. This set is quite compact.
Another type of sharpening machine is a bed with a holder, into which sharpening stones are inserted vertically at a sharpening angle; when working, the knife moves in a strictly vertical plane, sliding along the surface of the block from top to bottom.
The designs of such devices are quite varied and simple; anyone can make such a device from improvised means with a minimum set of necessary tools at home.
Electric sharpener
The fastest way to sharpen is with electric sharpeners for sharpening and polishing. Structurally, they are made in a closed case with a slot for inserting knives; inside there is an electric motor, on the axis of which conical abrasive wheels coated with diamond are attached. This method is not very popular in everyday life due to the high cost of the devices and is intended for professional work.
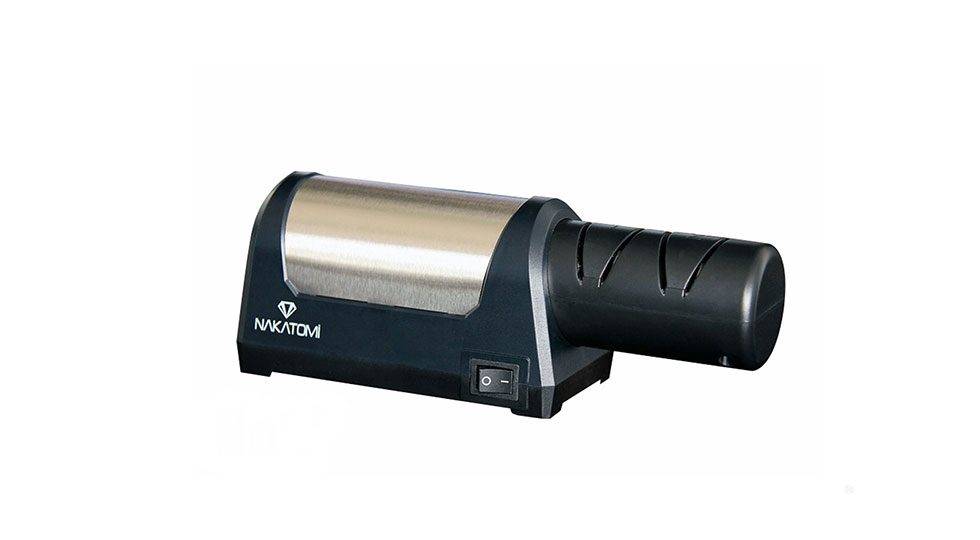
An electric sharpener will do all the work for you. All you have to do is hold the knife correctly at the right angle.
High-quality models of electric sharpeners usually have two types of abrasive wheels - the first for restoring the geometry of the blade, the second for its final polishing; the sharpening angle in such devices can be adjusted or set automatically.
Some models of electrical devices allow you to sharpen different types of kitchen knives: European, serrated, Japanese, ceramic, as well as scissors. In electric machines, each side has its own groove.
Operating rules
- If the working edge is heavily dented and jagged, the knife is processed using coarse emery. It is inserted into the groove and pulled towards itself, the number of repetitions depends on the degree of dullness of the cutting edge.
- After a visual or contact check for sharpness, the knife is inserted into the polishing groove and the process is repeated. To obtain a high sharpness of the blade, 5 - 10 broaches are usually required.
Grinder

The sharpening machine is a professional option; it can be used to sharpen a dozen knives in a short period of time
Many homeowners have at their disposal a sharpening machine - an electric motor with an abrasive grinding wheel mounted on a shaft, sometimes the machine has an adjustable rotation speed.
Abrasive wheels are often used for sharpening knives, but if used incorrectly (strong pressure and high speed), you can easily overheat the steel and render the blade unusable. To sharpen on a sharpening machine, you need to know the following rules.
A friend asked me to sharpen a knife that had been used in the kitchen for 3 years for a variety of tasks: chopping frozen meat and poultry bones. The blade made of 95X18 steel did not withstand the tests, and several chips appeared on the cutting edge, and the first 50 mm from the tip were initially “under-sharpened.” The owner was afraid to do any manipulations himself, although he has an abrasive block from a hardware store in his kitchen.

Advantages and disadvantages of “purchased” sharpening machines
The most common reason for failure when sharpening a knife is the difficulty of holding it in such a position that the approach angle remains constant. There are a lot of devices and machines that solve this problem.The main advantage of sharpening systems manufactured in production conditions is that they are ready for work; nothing needs to be completed.
However, they also have disadvantages:
- Most devices can only work at fixed angles (kitchen electric sharpeners, Lansky type devices).
- Systems with good functionality, such as Apex Edge Pro (Price about $300), cost a lot of money. Moreover, there are more clones and fakes on sale than originals.
- Almost all mechanical sharpeners remove a huge amount of metal and overheat the cutting edge. Exceptions, such as Tormek (Tormek T9 costs more than 50 thousand rubles in the minimum configuration. Equipment for the machine will have to be purchased separately and also expensive.), are HELL expensive.
- Not all “factory” designs fix the blade rigidly enough.
Homemade sharpener
The homemade device I use has seen at least a thousand knives, chisels and other cutting tools, so I have no doubt about its effectiveness. The design is extremely simple, and the most expensive thing about it is the sharpening stones. In the description I will not give specific sizes, only general ideas.
bed
The bed is a piece of iron from the “Young Bookbinder” set. It is quite large and massive, so it does not wobble even on “crooked” bases.
Rack
The tripod from the photo enlarger turned out to be an excellent donor. The standard lifting mechanism, which I use to adjust the angle of the stone relative to the plane of the blade, works smoothly and is securely fixed.
Inclined rod
A calibrated rod with a diameter of 10 mm is designed to hold and move the sharpening stone. It is attached to the lifting mechanism through a hinge - a steering end from a go-kart. The following parts are put on the rod: a plastic nut, a spring, two clamps with fixing screws, a nut on the back (so that the rod does not fall out of the hinge). This design allows you to work with stones of different lengths and quickly change them: I never fix the locking screw of the near clamp, and the stone is held by the spring force.Blade locking mechanism
Mechanism elements:
- Bracket. The part is made of duralumin and serves as a clamp.
- A bronze bushing with a semicircular groove is clamped motionless in the bracket.
- The shaft is seated with a gap of 0.1 - 0.15 mm, i.e. it rotates freely. The spring presses the fixing axis against the bushing.
- The channel is fixed to the shaft.
- Two pairs of jaws with M8 hammer bolts move freely along the grooves in the channel. After tightening the nuts, they are firmly fixed in position. The angle between the surfaces of the jaws adjacent to the channel flanges is about 75 degrees.


Sharpening procedure
If a used knife is being sharpened and it is necessary to maintain the angle of approach, then the work is performed in the following order.We clamp the blade in the jaws, having previously adjusted their position in width.
Before installation, we seal knives with a polished blade with masking tape to avoid leaving scratches.
Draw the cutting edge with a waterproof marker. We install an abrasive stone with the largest grain. We make several careful movements with the barbell from ourselves. Based on the abrasion of the marker marks, we determine whether the angle is chosen correctly. If the stone catches along the edge, then it needs to be enlarged, that is, the hinge must be raised. After correcting the angle, the abrasive should remove marker marks along the entire plane of the cutting edge.
Now you can proceed directly to sharpening. We make reciprocating movements with the bar and move along the edge of the knife until chips, creases and other defects are completely gone. We apply light pressure only when moving away from ourselves. The rod should return empty. On the last passes we release the pressure on the bar.

Pull the channel towards you and turn it 180°. We sharpen until the width of the inlet on both sides is approximately the same.
You don't have to constantly bend down to check the edge visually. One of the advantages of the device used is that the knife is attached once, it can be rotated as much as you like, and it will always stop in the desired positions.
When the second side is finished, a burr will appear on the first. You may not see it, but you can clearly feel it with your fingers. You need to make sure that the burr has formed along its entire length, otherwise later there will be “dumb” areas and the work will have to be redone.
You need to control the burr by moving your finger from the butt to the cutting edge, but not along it! Otherwise, cuts cannot be avoided.

The width of the cutting edge along the blade depends on the geometry of the slopes. On this knife, the lead at the tip is thicker than the rest.
Before moving on to a finer abrasive, use a sponge or paper towel to remove sawdust. We remove the risks from the previous stone on both sides. In this case, the burr should separate: not crumble in the form of dust, but fall off in thin threads.
Depending on the grain size, the second stone can also “pick” the burr. In my case, this is exactly what happened. Then we move on to the next grain.
We check the result of the work on a newspaper: we make a cut with a broach and control its smoothness. If there are any defects left, they will stick.

If you wish, you can try shaving the hair on your wrist.

The best way to check is to cut with a knife what it is intended for.

Abrasive stones
I use a set of diamond stones on a metal bond (4 pieces). Coolant – tap water. Some sharpeners wet the diamonds with soap emulsion. Some people generally work “dry” (see video). I sharpen according to the stone manufacturer's instructions, which recommends wetting the stone with water and periodically brushing off any metal filings.Grain sizes on bars (in microns):
- 125/100 – formation of the cutting edge, changing the sharpening angle;
- 63/50 – rough grinding;
- 20/14 – fine grinding;
- 7/5 – polishing.
Instead of diamond bars, you can work with artificial stones made of electrocorundum. There is an even more budget-friendly option: stick strips of sandpaper of different grain sizes onto aluminum or glass forms. The most important thing is that all the stones in the set must be the same thickness.
Knife sharpening video
In the video, the huntsman sharpens his working knife (Bohler M390 steel) on the device described above. He only uses one 63/50 stone and thinks that's enough. Characteristic movements along the edge - this is how he removes the burr.Perhaps I missed something in the description of the process or device, I deviated from some canons, I don’t pray to Arkansas and Japanese water stones. I suggest discussing these points in the comments.
If dull knives no longer perform their primary function or you're worried about cutting yourself on them, it's time to sharpen them with a whetstone. Sharpening stones, also called whetstones, are made from natural or synthetic materials and can be used dry, with oil or water. Having chosen a suitable sharpening stone, all that remains is to sharpen the knife blade on it to its former sharpness. And with skillful hands, your knives will be like new again!
Steps
Part 1
Selecting a whetstone- The frequency of use of knives should also be taken into account. If you use them daily, they will probably be duller than if you use them occasionally.
-
Select the appropriate type of whetstone. You will have to choose between a natural or synthetic whetstone, which can be used for wet sharpening (using water), oil sharpening, or dry sharpening. There are also diamond sharpening stones, which are metal whetstones coated with a layer of very small artificial diamonds. Sharpening stones for wet sharpening are the softest of all, so they can quickly sharpen knives. But, unfortunately, these stones wear out faster than others. Oil sharpening stones are among the cheapest and are made from harder materials.
- Working with an oil sharpening stone is quite messy and you have to clean up after yourself, but this type of sharpening stone itself lasts a long time.
- Diamond sharpening stones are among the most expensive, but they also last the longest.
-
Select the grit of the whetstone. Sharpening stones come in different grits. In general, they are divided into coarse, medium and fine grain stones. If your knives are completely dull, you need to start sharpening with a coarse-grained stone and finish with a fine-grained stone. If the knives have been sharpened recently and are not too dull, try sharpening them on a medium-grit stone. The grit markings for the right sharpening stones for you can be indicated by numbers ranging from 325 (coarse-grained stones) to 1200 (fine-grained stones).
- You may be able to purchase a whetstone with a different grit on both sides.
Part 2
Preparation for sharpening-
Follow the instructions that came with the sharpening stone you purchased. Since there are a wide variety of whetstones available, it is important to read the instructions that come with the whetstone you purchase. The instructions will tell you whether to wet the stone with water or oil it during the sharpening process.
- Diamond sharpening stones are usually used dry or moistened with water.
-
Practice holding the knife at a 20-degree angle to a flat surface. To find the right angle, first hold the knife in front of you with the cutting edge of the blade pointing straight down. This will be a right angle (90 degree angle). Tilt the knife about halfway to the side until it is at a 45-degree angle to the surface. Tilt the knife halfway to the side again so that the blunt edge is just slightly raised off the table. This will be an angle of approximately 20 degrees.
- If the knife blade is very large or thick, it may require a slightly larger sharpening angle.
- When using a very fine grit whetstone, you may want to use a shallower sharpening angle to avoid sharpening the knife blade too much.
EXPERT ADVICE
Experienced cook
Vanna Tran is a home cook. She started cooking at a very young age with her mother. Has been organizing events and dinners in the San Francisco Bay Area for over 5 years.
Vanna Tran
Experienced cookTake your knives to a professional knife sharpener to have them sharpened to the best possible quality. Seasoned cook Vanna Tran says, “I take my knives to a professional to be sharpened every three months. Of course, you can do this with a sharpening stone, but a specialist will cope with the task much better.”
-
Soak the wet sharpening stone for 45 minutes in water. If you took a wet sharpening stone, place it in a tray and completely fill it with water. Let it sit in the water for at least 45 minutes before sharpening your knives.
- If such a stone is too dry, it may scratch the knife blade or leave burrs on it.
- Do not soak a sharpening stone intended for sharpening with oil in water, otherwise it may be damaged.
-
Place the whetstone on a damp cloth. Dampen a cloth with water and wring it out. Place a cloth on your work surface and place a sharpening stone on top of it. The cloth will prevent the stone from moving when you sharpen your knives. Do this with any type of sharpening stone (wet sharpening stone, oil sharpening stone or diamond sharpening stone).
- If you have a double-sided sharpening stone with different grits, place it with the coarser side facing up. This allows you to quickly sharpen your knives before turning the stone over to the other side to polish the edge.
- You'll probably want to use an old cloth for the job, since you won't be able to clean it off any crumbs left after sharpening.
-
Lubricate the sharpening stone with oil. If you have a sharpening stone that requires oiling, you can spray it with oil or pour oil directly onto it. Rub the oil into the stone with your fingers. Make sure it is completely covered with oil.
- Use special oil designed for sharpening. It can be either mineral oil or oil made without the use of petroleum products. The sharpening oil will contain special additives that protect the metal of the blades being sharpened.
- Refrain from lubricating the whetstone with cooking oils (vegetable or vegetable oils).
Part 3
Knife sharpening-
Place the knife on the whetstone. With one hand, grasp the handle of the knife and place it against the sharpening stone at a 20-degree angle. The cutting edge of the blade should be facing away from you. Place the fingertips of your other hand on the flat part of the blade next to its cutting edge.
- The fingertips placed on the blade will apply pressure and control the position of the blade while sharpening.
-
Run one side of the blade along the whetstone. Slowly move the blade along the stone, gradually moving it in an arc. As a result, the entire cutting edge of the blade from base to tip should pass over the stone, ensuring uniform sharpening. Continue sharpening the knife on one side until it becomes sharp.
- Remember to moisten or oil the whetstone when it dries.
-
Flip the knife over to the other side to sharpen it as well. Turn the other side of the knife and run it along the sharpening stone from the base to the tip of the cutting edge. Repeat this step until the knife feels sharp to the touch when touched with your fingertip.
- Use extreme caution when touching the cutting edge of any knife.
-
Continue sharpening with a finer grit whetstone. If your knife was very dull and you first sharpened it on a coarse-grit stone, you will probably want to polish the edge on a fine-grit stone. Run one side of the blade from the base to the cutting tip over a fine-grit whetstone. Then turn the knife over to the other side and repeat the operation.
- Always sharpen your knives evenly to keep the blades balanced. For example, if you rub one side of the blade on a whetstone six times to sharpen it, you also need to drag the other side of the blade six times.
Examine the knives. Take out the knives you would like to sharpen. Look to see how dull the blades are so you can select a sharpening stone with the right grit. To test the knife, cut a tomato or apple with it. Assess the resistance that occurs when working with a knife. The greater the resistance, the duller the knife.
Every person who has cooked food at least once in their life knows how tiring it is to work with a dull knife. But a sharp, well-sharpened tool ensures not only speed and convenience of cutting blanks for various dishes, but also safety.
A dull knife often breaks and cuts the hands of its owner. Therefore, it is so important to maintain the sharpness of the blade by using it carefully and sharpening it in a timely manner. This article is devoted to how to properly sharpen a knife.
The best way to sharpen knives at home is considered to be manual work using whetstones with different grain sizes - starting with the coarsest.
They are sharpened until a narrow strip of metal appears along the entire length of the cutting edge - a burr. After which, they move on to using finer-grained tools.
Sharpening a knife on a block should be carried out according to the following rules.
- The bar should be 1.5 - 2 times longer than the blade.
- The whetstone is placed on a table or other stable surface.
- Wet the bar with water or an aqueous solution of soap.
- The blade, in addition to the cutting edge, is sealed with tape to avoid scratches, and it is better for an inexperienced craftsman to paint over the edge with a marker to make it easier to determine where the block has been touched and where it has not.
- The cutting edge of the blade is located at right angles to the block, making the sharpening uniform.
- The pass is made with the cutting edge forward. They begin sharpening from the place where the handle is attached and, together with the movement of the blade along the block, pull the knife towards themselves in such a way that, reaching the end of the block, they simultaneously reach the tip of the blade.
- The sharpening angle of the knife should be maintained between 20 and 25 degrees between the block and the plane of the tools intended for cutting. This angle is slightly larger for those whose purpose is chopping. The main thing is not to change the angle along the entire length of the blade.
- When the blade reaches the edge of the stone, you need to make sure that it does not fall off the block or get scratched.
- These movements are repeated many times, but you should not put too much pressure on the blade, since this will not sharpen the knife faster with a whetstone, but the correct angle will be much more difficult to maintain.
After sharpening kitchen knives is completed with a coarse and fine-grained stone, you should begin grinding them, the purpose of which is:
- removing burrs (to ensure durability of sharpening);
- giving the blade flawless smoothness.
Grinding is also performed with a whetstone, but with the finest grain size.
Types of knives
Over a long history, specific types of knives have been developed for various spheres of human activity. For their manufacture, steel of varying hardness is used, but the optimal value is 45 – 60 HRC. This indicator also determines what sharpening angle should be used.
The most common varieties are kitchen and hunting.
Kitchen knives

This tool is present in every kitchen. Housewives use it to cut vegetables, meat, bread and other products.
Kitchen knives are such a broad concept that includes more than a dozen specialized tools.
- For the cheese.
- For pizza.
- Chef's knife.
- For bread and many others.
However, in most cases, you can limit yourself to three types.
- A chef's knife, the length of which is more than 200 mm, and its purpose is to cut vegetables and cut meat products.
- A knife used to peel vegetables. It is pointed and has a shorter length, from 50 to 100 mm.
- Knife-saw. It is used to cut bread. In order not to crush or crumble the loaf when cutting even the thinnest slices, the blade of the saw knife is equipped with a serrator - special notches on the blade. It is very difficult to sharpen such a kitchen knife at home.
Two materials are used to make kitchen knife blades:
- steel.
- ceramics.
The best models are made from stainless steel with a high carbon content. They are quite durable, they can be sharpened at home, and you can cut any products with such tools without fear of oxidation.
Ceramic blades are hard and hold an edge well, but are very fragile (easily broken into pieces when hitting hard objects). Their owners are interested in how to properly sharpen kitchen knives made from this material. This is quite difficult to do, because ceramics can only be processed with diamond wheels.
Hunter knives

Very high demands have always been placed on such tools, since a hunter can find himself in different situations, sometimes even life-threatening, from which only the right reliable blade will help him get out.
The requirements for it are higher.
- Convenience combined with quality and practicality.
- A “warm” wooden handle is a must.
- Minimal guard or complete absence of one, so as not to interfere with the cutting of trophies.
- The blade must be made of Damascus steel, which has sufficient strength and, at the same time, does not crumble as a result of impacts against the bone of an animal.
- The optimal linear dimensions of a hunting knife are as follows: blade length 100 - 140 mm, its width up to 30 mm, spine thickness from 3 to 4 mm, steel hardness - more than 58 HRC.
For ease of processing the prey, the butt of the tool is equipped with a special hook for skinning.
Other varieties
In addition to those listed above, there are a number of other specialized types of knives.
- Combat (intended for the army and special services).
- Tourist. The lightness and practicality of the tool is ensured by the use of synthetic materials for the handle and steel blade, which is easy to sharpen and edit correctly.
- Folding (convenient for concealed carrying).
- Multitools are folding knives with many other useful tools hidden in the handle.
- Special purpose. A category in which there are many different types - for divers, gardeners, surgical scalpels and many others.
- Camp ones. These are fixed blades, suitable, among other things, for cutting small branches. They are used as small machetes.
- Sports. Essentially, this is equipment for throwing. They have neither a cutting edge nor overhead handles.
- Dining rooms (used for table setting).
It is worth mentioning separately the survival knives that appeared relatively recently. This is a multifunctional tool, a kind of multitool, which includes such unexpected components as a compass or a lighter.
How to evaluate the sharpness of a blade?
For any type of knives, the main requirement is their sharpness. A well-sharpened knife is a reliable and safe assistant in a variety of jobs. In order to determine how well you managed to sharpen a knife at home, there are several simple methods.
Paper test
In one hand there is a sheet of A4 paper, in the other there is a sharpened blade. You need to try to cut a piece of the sheet.
If the cut turns out to be smooth, then the sharpening was successful, but if the blade slipped or the cut turned out to be uneven, then you need to think about how to sharpen the knife better.
The task can be complicated by using a thinner magazine sheet.
Tomato test
As a rule, it is used to determine how well sharpened kitchen knives are. However, you can test any other blades this way.
The essence of the method is to cut a thin slice from the edge of a ripe tomato. If the blade did not slip, but cut off a piece of the required size, then the knife was sharpened well.
Hand hair test
The blade is held without touching the skin against the growth of hair on the arm.
If all the rules for sharpening a knife are followed exactly, it will cut hairs easily.
Why does a knife get dull quickly?

Any blades, even the highest quality and most expensive ones, will become dull after some time. Simply, the better the quality of the tool, the longer you will be able to use it without having to sharpen it.
There are several reasons that cause the blade to lose its former sharpness.
- Gradual slow erasing of steel.
- Bending the cutting edge to the sides. It occurs due to high lateral loads on it, when the blade is deflected to the side during cutting.
- Incorrect sharpening angle of a kitchen knife (as well as blades of other types).
- Impacts of the cutting edge on hard metal objects.
- The influence of abrasive particles present in the material being cut or on its surface (grains of sand on fruit).
It is also believed that the knife will become dull faster when washed with hot water. This can be justified by the effect on the cutting edge of aggressive salts dissolved in water, the chemical activity of which relative to iron increases when heated.
What is the best way to sharpen knives?
Selecting a sharpening tool is no less important a task than selecting the knife itself. There are a great variety of them on the market, but what and how to sharpen a knife correctly should be examined in more detail.
What is musat?
This tool is similar to a regular file - a rod connected to a wooden or plastic handle.
Knife grinder performs a very important function - it is used to straighten the cutting edge of knives, avoiding complex and time-consuming sharpening. Most often, it is used to care for kitchen tools that are constantly in use. However, musat is not suitable for sharpening those knives that have already lost their sharpness; they will have to be sharpened.
What is musat? These are round or faceted tools, for the manufacture of which diamond dust, ceramics or high-hardness steel are used. To straighten kitchen knives at home, it is enough to have a grinder 250 mm long.
Sharpening a knife with musat

Having picked up this tool for the first time, people naturally wonder how to sharpen knives with musat?
This is quite easy to do if you follow certain rules.
- The knife to be sharpened should be taken by the handle and placed vertically, resting the tip on the table.
- The angle between the plane of the blade and the device should be 25 degrees.
- The tool should be moved in an arc, from the handle to its tip.
- Treat the other side of the blade in the same way.
- There is no need to put in unnecessary effort.
To the question of how you can use musat for sharpening a series of dull knives, the answer is clear - in such cases, it is better not to use it at all, since it will not correct the situation.
Whetstone (Whetstone)
The most accessible and gentle way to tidy up a cutting edge is to sharpen it using a whetstone. Stones of different grain sizes allow you to cope with defects of any severity: from correcting serious nicks to grinding.
The device is as old as the hills, but if the question is how to properly sharpen a hunting knife, most people will do it with a whetstone.
The processing technology is as follows.
- Take several bars with different grain sizes.
- Before sharpening kitchen knives or any other blades, the surface of the block is moistened with a special oil, which is usually sold complete with the product, or with plain water. It is not advisable to use sunflower oil for this, since it penetrates deep into the pores and it will no longer be possible to wash it out.
- First, treat the blade with a large-grained stone, then medium, then fine, placing the tool vertically and holding it by the handle.
- Place the stone perpendicular to the blade, gradually moving it down. Repeat on one side two to three times, then start on the other.
- The burr formed from a coarser stone is removed with a smaller one.
- At the end, the blade is ground and washed with water to remove any remaining fine metal shavings.
If you don’t have a sharpening stone at hand at the right time, then there is a substitute called sandpaper. How to sharpen a kitchen knife with it? Just like a whetstone.
Grinder

Such a useful device as a knife sharpening machine is also quite popular. Although it requires the user to have a certain skill and decent work experience.
On a sharpening wheel rotating at high speed, in a split second you can overheat the blade, after which it will become unsuitable for further full use.
At what angle to place the blade to the disk, you will need to select it yourself, since the machine does not provide special fasteners for fixing the tool in a certain position.
But an experienced person will be able to use such a machine to sharpen any knives at the highest possible speed.
Emery
In addition to the above methods, you can also sharpen the knife using sandpaper.
This is the name of an electric machine that can be equipped with several types of wheels:
- abrasive;
- felt;
- grinding.
Each of them has its own function. An emery machine is professional equipment, and sharpening blades on it requires high qualifications. People without experience are not recommended to use it to work with blades, since in most cases they will overheat and render any knives unusable.
Other types of sharpening equipment

The latest developments among devices for sharpening blades are specialized mechanical and electric sharpeners. Their main area of application is sharpening kitchen knives, as well as household scissors.
A mechanical sharpener is easy to use and inexpensive. But before you sharpen a kitchen knife with such a tool, you should know that it will not be sharp for long, due to the poor quality of the cutting edge.
As for more expensive blades for hunting or sports, this device can only ruin them. Although there are pleasant exceptions to this rule. For example, the Edge Pro Apex sharpener model. This is a high-quality tool with which you can sharpen blades quite well.
But electric sharpeners are a completely different matter. A high-quality tool of this type is capable of sharpening both kitchen and sports knives with both straight and wavy blades, as well as scissors and screwdrivers.
The sharpening unit of the unit adjusts to the required processing angle and clearly maintains it along the entire length of the blade. Modern units are able to restore the sharpness of even a very dull blade. With their help, you can also perform delicate work - both straightening a knife and polishing it.
Electric sharpeners have now become quite compact and affordable, and at first only large catering establishments could afford to purchase them.
At what angle should you sharpen the blade?
The sharpening angle of the blades depends on the tasks they will perform.
- Scalpels and similar cutting medical instruments are sharpened at an angle of 15°.
- Kitchen - 25°.
- Tourist and kitchen cleavers designed for chopping bones and meat - 25 - 30°.
- Tools designed to cut cardboard - 30 - 40°.
The following video will show you how to properly sharpen knives with a whetstone while maintaining a given angle:
How to set the sharpening angle on a sharpener?
Let's look at how to sharpen a knife at a certain angle on the Edge Pro Apex sharpener, model 2013, a fairly popular and useful unit.
To simplify the work of users, the manufacturer has equipped this unit with a set of replaceable inserts, by changing which, you can set the required sharpening angle of blades for any purpose.
For convenience, these liners are made in different colors:
- blue color - provides a sharpening angle of 24°, suitable for thick blades of pocket and hunting knives;
- yellow - an angle of 21° (for blades of the same types, but with blades of smaller thickness);
- green - angle 18° (kitchen knives with thick blades);
- red - 15° (kitchen tools with thin blades);
- black - 10° (kitchen knives with serrated blades).
Changing the inserts is not difficult. Thanks to these devices, uniform sharpening of the blade blades at the same angle along the entire length is ensured.
At what angle should you sharpen kitchen knives?

The selection of the blade sharpening angle depends on three parameters:
- purpose of the instrument;
- blade thickness;
- the quality of the steel from which it is made.
The more rough the work will be performed with this tool, the greater the sharpening angle should be - from 10° for serrated blades intended for fine slicing, to 30° for cleavers used to chop meat and bones.
The thicker the blade, the greater the sharpening angle is suitable for it - from 10° for the thinnest ones, to 18° for the thickest ones, intended not for chopping, but for slicing.
The higher the quality of the steel, the smaller the sharpening angle can be set, since good steel guarantees a hard cutting edge.
How to sharpen a knife?
To summarize, we can say that only a knife that has been processed in accordance with a certain technology and that has passed all tests for the sharpness of the cutting edge can be called well-sharpened. It is worth noting that this is also possible at home.
Dull knives create acute problems both in the kitchen and in family relationships. Who can remain calm when culinary inspiration comes in the form of painful attempts to chop vegetables or break apart raw chicken? Unsharpened knives are rightly considered a sign that the owner is absent from the house. After all, men know much better how to sharpen a knife.
Dull knives crush and crush food; in addition, according to statistics, they most often cause household injuries in the kitchen
Is it possible to avoid such problems, in other words, how to sharpen a knife at home, we decided to consider in detail in this article.
Take knife sharpening seriously and be careful!
Main characteristics of knives
Material
The answer to the question of how to properly sharpen a knife primarily depends on the quality of the material from which the blade is made. The easiest to produce and, accordingly, the cheapest are stamped stainless steel blades. Such products become dull rather quickly, do not hold an edge well, and often give the products a characteristic metallic taste.

Knives made from higher-quality types of steel (high-carbon stainless steel, carbon alloy, multi-layer, powder), especially forged ones, are significantly superior in hardness, wear resistance, toughness and anti-corrosion properties to their stamped counterparts.
 Chef with personal set of knives. Professionals do not like to trust anyone else to sharpen their tools and often sharpen their knives themselves.
Titanium knives are lightweight and flexible; at normal temperatures, a protective film of titanium oxide forms on their blade, which gives the metal additional resistance to corrosion (except for exposure to an alkaline environment).
 It is important to know how to sharpen a knife made from a particular material. The photo shows knives with titanium blades
Ceramic knives are now becoming very popular, as they retain their sharpness for a long time and practically do not require sharpening. Ceramics are neutral in relation to substances contained in food products, therefore they do not leave any aftertaste or darkening on cuts and are not susceptible to corrosion. Is it possible to sharpen a ceramic knife? Read on.
 Ceramic knives can be not only sharp, but also very colorful
Purpose, shape of blades and edges
According to their purpose in everyday life, knives are divided into table knives, which are served when setting the table, and those used in the cooking process. Kitchen knives usually include 1-2 universal cutting knives, as well as several special-purpose tools, for example:
- for bread - a long knife with a smooth, straight blade and a serrated (wavy) edge;
- for peeling vegetables - a knife with a short straight or concave cutting edge of the blade having an acute angled end;
- for cutting meat and poultry - a cleaver, reminiscent of a hatchet, with a wide blade, which is convenient for cutting small bones.
It is important to understand that how to properly sharpen a knife depends on the shape of the blade, that is, at what angle of the cross-section of the cutting edge should be sharpened in each specific case.
Tools and sharpening methods
The easiest and fastest way to sharpen a knife is the “two-knife” method.
 The main advantage of this method is that it does not require any special devices: you only need two knives
Before sharpening your knife, wash it thoroughly to remove all dirt with cold water. Cooled steel sharpens better.
The whole wisdom lies in the fact that a knife is taken in each hand and the cutting edge of one is sharpened due to intense friction against the cutting edge of the other. Since the edges have a slight surface grain, steel blades do become sharper, but not for long. This is more of a preventive measure than a full-fledged way to sharpen a knife.
Grinder
If you live in a private house, then the most professional solution would be to purchase a sharpening machine.
 Using a sharpening machine, you can independently sharpen not only knives, but also all gardening tools: shovels, axes, hoes, etc.
The machine quickly and efficiently carries out all stages of sharpening - eliminating irregularities, restoring the angle of the cutting edge and straightening and fine-tuning the sharpness of the blades.
Bar
The most common tool used in everyday life is the whetstone. To properly sharpen a knife, you need to get the desired angle without removing excess steel and achieving the required sharpness. It is important to determine the optimal inclination of the blade in relation to the block: it is calculated as half the angle of descent of the blade. That is, if the cutting edge in cross section looks like an angle of 45°, then the knife must be placed on a block with an inclination of 20-25°.
Knives for fine work are sharpened at the sharpest angles - from 10 to 20°, chef's knives of various profiles - 20-25°. To understand the process of how to sharpen a knife on a whetstone, it is recommended not to take the most expensive and high-quality one first, but to practice on a simpler knife.
For better glide, the block is moistened with water (you can wipe it with a sponge and some detergent). The pressing force should not be too strong; it is better to control the forces when processing both sides of the blade so that they are the same. The movements are made in a wide arc alternately: first from yourself, sharpening one side, and then towards you, running the other side of the blade along the block. It is recommended to carry the knife with the sharp edge forward, from the handle to the tip.
 Lapping on a fine-grained stone ensures the required sharpness of the cutting edge and the absence of burrs on the metal
If you make more movements on one side than on the other, the sharpening may turn out to be asymmetrical. When the sides of the cutting edge are sharpened at different angles, the knife becomes unusable.
As an alternative to a sharpening stone, you can take an emery cloth, but it is better not to sharpen it, but only to finish sanding it using fine-grained paper, which will not damage the blade or disrupt the original angle of the cutting edge.
Japanese water stones
They differ in the grain structure. Stones with large grains (from 120 to 200 numbers) are used to level the cutting edge and correct its shape; with medium grain size, the desired edge angle is restored. The most suitable stone for sharpening a kitchen knife is a stone with a grit of 1000. It is convenient to sharpen the cutting edge to a sufficient sharpness. Polishing stones (from 1500 to 3000) allow you to achieve a razor sharp blade.
Sharpening is done as follows: the stones are first soaked in water for 15-20 minutes (that’s why they are called “water”), then the blade is pressed at such an angle that the descent plane is in close contact with the stone, and first one side is sharpened until an edge is formed on the opposite side . Then they turn the blade over and straighten this edge.
 During the process, the stone is additionally moistened with water, and when changing the grain size, the blade is thoroughly washed
Sharpeners
Ready-made knife sharpeners are a very convenient device. Sharpening is done using metal discs built into a plastic body. Often, in addition to the main slots for sharpening tools, there is another one with ceramic or other grinding surfaces for fine finishing. The main advantage of compact sharpeners is that they provide and set the most suitable sharpening angle for kitchen knives - 10-20°.
 To correct the edge and eliminate small defects, move the knife from top to bottom along the slot several times without removing it from the sharpener (follow the instructions for your sharpener)
Musat
This device is used for straightening knives. Musat ensures their long-lasting sharpness and allows you to not worry so often about sharpening your knives. When the blade begins to dull, its cutting edge flattens and jams, bending unevenly in different directions.
 Musat straightens nicks, restoring a smooth cutting edge
At the moment, ceramic and diamond-coated musats are often used. It is preferable for them to regularly sharpen knives made of medium-hard steel (soft metal is too “chosen”, and durable metal is chipped). It is recommended to rest the musat rod against a non-slip surface (you can place a towel) and lightly move the blade along it from the base to the very tip of the blade, alternating the sides of the knife 4-5 times. You can see how to use musat in the following video:
Those who, instead of a bunch of dull knives in the kitchen, prefer to have one but constantly sharp professional cutting tool, choose expensive models made of high-quality multilayer steel, titanium, and zirconium ceramics.
 Knives with a magnetic coating, with a serrated edge and ceramic are considered self-sharpening.
The loud name “self-sharpening” is rather an advertising gimmick. This refers to the technology of laser processing of the cutting edge of steel blades. They make notches, which are melted, then the metal is slightly hardened again. As a result, the cutting surface turns out to be unevenly hard, that is, in unhardened places there are “offsets”, and in hardened places there are teeth. As the knives are used, the metal projections become larger, and the teeth become sharper accordingly.
Such knives can only be damaged by sharpening, as they will simply lose their properties. The same applies to knives coated with a magnetic alloy. The outer layer remains sharp for a long time, and attempts to sharpen the knife deform and grind it down.
Another type of knives that are considered self-sharpening is ceramic. They really stay sharp for a very long time, but their blades are too strong and lack flexibility. Such knives do not become dull, but rather break and lose their cutting properties due to nicks on the edge that appear when handled carelessly. Therefore, if you are interested in how to sharpen a ceramic knife, it is better not to do it yourself.
The presence of zirconium oxide in a ceramic knife slightly increases its flexibility and resistance to fractures.
Straightening a ceramic knife is only possible with the help of tools and materials that are harder than the ceramic itself, such as a diamond wheel. Manufacturers of zirconium ceramic instruments recommend sharpening 1-2 times a year and offer such services in their service centers, but not everyone can afford it.
At home, it is recommended to use diamond stones or pastes, which will require several hours of painstaking work and great care to sharpen a ceramic knife.
Also on sale are quite expensive specialized knife sharpeners made of zirconium ceramics - mechanical and electric. They are much more convenient to use, but given the fragility of the material, any careless movement can lead to breakage of your favorite knife. In order to carry out quality sharpening and even straighten small chips, it is important to take into account the thickness of the blade and what angle the sharpener is designed for, as well as have some experience and skill.
 It’s still better to entrust sharpening knives to men, so at least there will be someone to shift the responsibility to if something goes wrong
When industrially sharpening ceramic knives, the edge in the cut (cross section) is made slightly convex, which is impossible to achieve at home. If you still have any questions about how to sharpen a knife, watch the following video.
Fresh lemon is not only suitable for tea: clean dirt from the surface of an acrylic bath by rubbing with half a cut citrus, or quickly wash the microwave by placing a container of water and lemon slices in it for 8-10 minutes at maximum power. The softened dirt can simply be wiped off with a sponge.
The habit of using an automatic washing machine “sparingly” can lead to the appearance of an unpleasant odor in it. Washing at temperatures below 60℃ and short rinses allow fungi and bacteria from dirty clothes to remain on internal surfaces and actively multiply.
The easiest way to remove scale and carbon deposits from the soleplate of the iron is with table salt. Pour a thick layer of salt onto the paper, heat the iron to maximum and run the iron over the salt bed several times, applying light pressure.
Threads made of gold and silver, which were used to embroider clothes in the old days, are called gimp. To obtain them, the metal wire was pulled for a long time with pliers to the required fineness. This is where the expression “to drag out the rigmarole” came from - “to do long, monotonous work” or “to delay the completion of a task.”
Inna 02/25/2018 14:51