What is a 4 cm mat. How to make a mat for children’s work yourself
I would like to continue the theme of painting design, touched upon earlier.
From this article you will learn how to properly design graphic and watercolor works; I will show you two ways to make mats with your own hands.
Drawings and watercolors drawn on paper require registration in passe-partout.
A passe-partout is an additional background field around an image, usually a cardboard “window” that separates the painting from the frame.
For oil paintings you don't need a mat. They are directly inserted into the frame and framed by it.
But with graphic works the situation is different; for them it is customary to add a background of a white or colored field around the drawing, and only then insert it into the frame.
Self the word "passepartout" French origin and translates as "suitable for everything, magic key."
This “magic” material allows the painting to “breathe”, giving it free space around. And the viewer, in turn, concentrates on the image!
The size of the fields of the finished passe-partout can be very different, but, as a rule, varies between 3-10 cm.
But the size is 5 cm is the recognized standard of the golden ratio among professionals. By the way, it is this one that is used much more often than others!
I will note 2 important requirements for the passe-partout:
- the material for the mat should be dense, it should not warp or ripple due to humidity
A bevel inward to the work is desirable (gives a beautiful white edge)
It is almost impossible to make such a mat from thick cardboard and with a bevel yourself. True, there is a special cutting tool. But purchasing it for one or two jobs is pointless.
Therefore, if possible, it is better to contact a framing workshop. There they will help you professionally frame your work and choose the appropriate mat.
However, if you have a lot of work accumulated, and professional decoration is beyond your means, then you can try to decorate the paintings at home.
In the video below I'll show you how to do it!

To make a passe-partout with your own hands you will need:
- a sheet of whatman paper, pastel paper or cardboard (larger in size than the work format)
- ruler (preferably metal)
- paper cutting knife
- scissors
- pencil
- masking tape
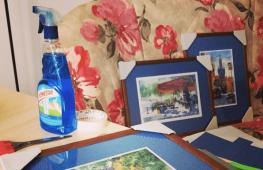
- window cleaner
- rag
- calculator
- photo frame
how to make a passe-partout with your own hands: method No. 1
In this fastening method, we cut out a window from colored or white cardboard.
As you noticed, here we attached the watercolor to the backing. And they did it with masking tape. This option is quite environmentally friendly, but still... Even by attaching the paper to one side, we thereby deprive it of the ability to breathe (to expand and contract when the humidity in the room changes).
Therefore, I would like to offer an option for a more economical passe-partout, when we do not attach the work, but the passe-partout itself holds it:
how to make a passe-partout with your own hands: method No. 2
To allow the pattern to “breathe”, we use a fastening that does not limit it, creating a special “envelope”.
As a result, such a mat has a certain thickness, which looks even more presentable in appearance compared to the first option.
True, this option is more suitable for small-format works.
I hope these videos will help you cut out mats with your own hands correctly.
When making a mat for a painting, it is important choose the right color.
However, sometimes you can use quite bright colors. For example, I love burgundy, gray-green, and discreet blue. But, of course, such a decision must be justified in some way. The color of the mat should be in harmony with the color of the picture and match the tone of one of the elements of the picture.
And, of course, the color of the mat should be in harmony with the interior in which the painting will hang.
If we talk about choosing a mat for black and white graphics, then achromatic (gray tones), as well as discreet cream ones, are best suited for it.
White color visually enlarges the picture, it is good for bright multi-color images. However, white somewhat blurs the attention from the picture.
And here dark mats, on the contrary, they collect attention on the image, focus on it, make the picture more complete and isolated. But in this case, the picture should be more complete and harmonious in color.
In conclusion, I want to say that no matter what stage of learning to draw you are, your drawings and watercolors must be framed and hung on the walls! I assure you, even a poor sketch in a mat looks different, more complete, integral, and important.
So be sure to select a few of your drawings today and cut out a mat for them, at least from a thick white sheet of paper. Look at your work from a different angle!
Passepartout is colored cardboard that fills the space between the artwork and the frame. You may need it for graphics, watercolors, embroidery, as well as photographs and other creative works that you would like to frame.
A passe-partout for drawing or embroidery is a neat decorative element, carefully selected in color and texture, that can highlight your work or place a small text inscription. In addition, with a mat there is no need to select a frame according to the size of the work being framed.
Features of choosing a passe-partout
It is important to choose the right passe-partout so that it looks harmonious. It is important to pay attention to the color; it should contrast with the main work and support the color scheme of the frame. In addition, it must have a certain width ratio between the frame and the size of the inscription.
A double passe-partout looks impressive, as well as an option with different widths of the upper and lower frames. But it is equally important to carefully cut out the mat. By following simple instructions, you can easily make a passe-partout with your own hands.

To create you will need:
Cardboard or a piece of thick paper of the chosen shade. These can be either matte or shiny options. It all depends on what design you choose for yourself.
You also need sharp scissors or a utility knife
Ruler, preferably metal
Glue
When working with a knife, be sure to use a special backing that will prevent damage to the table during cutting.
How to cut a passe-partout correctly?
First, decide on the size of the frame. It should be 5-7 centimeters larger than the finished painting on each side and fit in shape (proportional rectangle, square, elongated shape).

Before you start making a passe-partout with your own hands, be sure to measure the internal size of the frame. The underlying cardboard and the cardboard from which you will cut the mat should be a few millimeters smaller than the frame itself. But do not overdo it, otherwise the work will fall out of the frame, since it cannot be secured tightly
Next you need to decide on the internal dimensions. Measure the width and height of the design (embroidery), adding 2-4 centimeters from each edge, depending on the size of the work
Now you need to calculate the width of the mat for embroidery. Simply measure the inside length and width of the frame, subtract the length and width of the painting from it, respectively, and divide in half. This will be the width of the mat along the long and short sides of the picture.
Set aside the required dimensions on the passe-partout blank, draw with a pencil, cut along a metal ruler with a sharp knife, using a mat
Next, you need to glue the work to the mat from the inside, carefully observing the location (stepping back 2-4 centimeters from each edge). For gluing it is better to use double-sided tape

All that remains is to place the work in a frame. The problem of how to make a passe-partout has been solved.
Unusual solutions for paintings
In addition to the classic mat for paintings, there are non-standard solutions. For example, it could be a passe-partout made of paper with a pattern or ornament, both floral and figured.
In addition, photographers and embroidery lovers are wondering how to make a double mat. To do this, just cut out two mats, one 3-5 mm wider than the other, put them on top of each other and glue them with double tape. However, care must be taken to ensure that both sides of the inner mat are the same size. Only then will the design of the painting look neat.

A stylish mat allows you to give your painting a truly finished look. It’s not difficult to make, but a lot depends on how harmonious the color and texture of the material you choose will be. It should also blend in with the frame of your work.
Only after trying several options can you be fully confident that your painting will look like a real masterpiece.
Or the production time for the mat is set to be long, but the embroidery, for example, is intended for a gift and the deadlines are running out; agree that there can be a lot of reasons. If you have the desire and a little skill in working with cardboard and paper, there is always a way out. True, without a special professional tool it will not be possible to achieve a chamfer of 45° here, but you can get a thin strip 1-3 mm wide, which from a distance of about half a meter will be indistinguishable from a chamfer.
We will need:
1. Metal ruler, preferably at least 4 cm wide
2. Knife with replaceable blades
We buy in finishing materials stores, or in construction stores.
3. Double-sided tape
4. A sheet of good cardboard (that’s what it’s called - cardboard for passe-partout),
5. Paper (40x60 cm) for drawing with pastels (it comes in different shades, I think it was made in Italy).
We buy it at a stationery store, or at an artist supply store.
If there is no paper of the required color, and the size of the mat does not exceed the size of an A3 sheet (this size is determined by the printing capability of a color printer), I simply use graphic programs to select the desired shade, “fill” the sheet, and then print it on the printer and use it in further work. Moreover, those printed on a string printer are much better than those printed on a laser printer.
The mats in the photo were made using sheets printed on a printer.
On the back side of the cardboard I mark the required dimensions of the mat, then using a knife and a ruler I very carefully cut out a frame from the purchased cardboard.
Of course, you need skill, you can practice on small pieces.
It is not possible to cut immediately in one cut, especially at the corners, so sometimes you have to cut the knife twice. Is it better to cut on special mats or on a piece of glass or mirror? I cut on thick glass.

If the color of the mat is not suitable for this design, I continue.
I cut out a mat of the same size from purchased paper of a suitable shade. I cut out the inner window 1-1.5 mm larger than the original one, this is done so that a light strip is preserved along the inner perimeter, which visually looks the same as the “chamfer” cut into the baguette, cut at an angle of 45°.
On the cardboard passe-partout from the front side I paste strips of double-sided tape around the perimeter. At the same time, I retreat from the inner window by about 3-5 mm. Why I am doing this will become clear at the next stage.

Then I carefully “plant” the paper passe-partout onto the cardboard. I precisely place the cutout on top of the protective layer of tape.
It is most convenient to start gluing with one of the horizontal stripes.
One by one, carefully bending back the paper passe-partout, I remove the protective layer from the strips of tape and secure the horizontal and then the vertical sides.

Paper is still a delicate thing, subject to slight stretching or displacement, and when gluing it is not always possible to ensure that the remaining light strip at the passe-partout window is the same width (up to a fraction of a millimeter) on all four sides.
Using a knife and, again, a metal ruler, very delicately (so as not to cut through the cardboard mat) I trim the paper mat.
This is not difficult to do, you just need to either accurately mark it, or carefully and carefully navigate by eye.
The trimmed paper is easily removed, since (remember?!), the glued tape does not reach 3-5 mm to the inner window.
Voila! As a result, we have a ready-made mat of the desired color with a light outline of the same width

If you want to highlight the design even more and get a volumetric effect, we do contrasting outline - double passe-partout.
I usually make a similar second frame out of cardboard and connect them with double-sided tape.
But in this case, the size of the finished work is 60x45 cm, and I didn’t want to weigh it down with additional cardboard.
Therefore, I stick tape on the wrong side and attach the top passe-partout to a sheet of contrasting paper.

Then, using a knife and a ruler, I cut out a window inside, leaving a strip 1 to 3 mm wide, depending on the desired, intended result.
Thus, within a maximum of half an hour, a double passe-partout is ready.
And the remaining “middles” are used to make smaller ones for subsequent works, which at home leads to certain savings on consumables for designing your own works.

The photo shows some of my designed works with self-made mats.

Due to the nature of my work, sometimes I have to deal with the owners of framing workshops in our city; they are always very surprised when I tell them that I made these mats myself. And they are always surprised at how I stretch my embroideries and how, in a good sense, I “experiment” with the frames ordered from them.
DIY passe-partout. Master class with step-by-step photos
Master class on making mats for children's work
The master class is designed for primary school teachers, fine arts teachers, organizers of children's movements, teachers of additional education, heads of clubs, methodologists, creative people involved in organizing exhibitions of children's works.
Tasks:
- teach techniques for making mats
- develop creative imagination, constructive thinking;
- instill the ability to see beauty;
- cultivate accuracy when performing work;
- receive a positive charge from work..
You will need:
1.A-4 paper
2. Ruler
3.Scissors
4. Children's work
5. Portrait from a magazine
6.Postcard

Passepartout (French passe partout) is a piece of cardboard or paper with a quadrangular, oval or round hole cut out in the middle for a frame into which a photograph, drawing or engraving is inserted. This allows you to more freely select the frame size to match the image size.
Passepartout for children's works contributes to the aesthetic perception of works and instills this taste in children. It should be noted that a mat for students’ work helps to coordinate the image with the wall or stand where the work will be placed.
1. We begin the work of making a passe-partout by marking it on a sheet of A-4 paper. Take a sheet of paper, a ruler and a pencil. Stepping back from the corners by 2 cm, we place points, then we connect these points using a ruler.

By connecting the marked points, we get a rectangle.

2. Connect the opposite corners of the resulting rectangle diagonally.

3. We make a slot in the center and bring the cuts to the corners of the rectangle diagonally.

A rectangle cut diagonally will look like this:

4.Using a ruler, sequentially bend the cut parts outward.


Turning over the sheet with the folded parts we will see the following frame:

Turning the passe-partout over again, we carefully place the student’s work.

5.Then we bend all 4 parts sequentially along the outer contour of the children's work.
6. Carefully turn it over and see the result of your work.

You can place children's works, portraits, illustrations from color magazines, and postcards in the mat. They will have a pleasant aesthetic appearance. Thus, we develop aesthetic taste, accuracy, and respect for the work of our friends.

In this way you can decorate any illustration, portrait from a glossy magazine, giving it a pleasant aesthetic look. For example, how can you ennoble the portrait of the world's first cosmonaut Yu.A. Gagarin.


In such mats, children's drawings look like the work of real artists.
It is no secret that the harmonious design of an image improves its visual perception, so it is very important to choose the right mat. A bright cardboard frame will give a finished look to a drawing, painting, engraving or photograph. In the online store of the art market “Red Pencil” you can buy cardboard for mats at an affordable price.
Basic selection options
Dimensions. Depends on image parameters. The average width of the margins of the passe-partout is 6 cm. For a more harmonious perception of the picture, the bottom should be slightly wider than the top and sides. If the image is dynamic and the perspective goes beyond its limits, then it is better to frame it with a wider mat.Color. For monochrome images, it is better to choose calm black and white or gray mats. For color works, a frame of any color is suitable, but it is worth remembering that it must be combined with the main tones of the picture.
Our range
The catalog of our online store includes mats from Russian companies Tuyukan and Lion. Here you will find a huge selection of models of various shades, textures and thicknesses.You can buy a ready-made mat or make it yourself from special cardboard. Product sizes may vary. We have for sale a passe-partout with figured windows.
Our products will give a finished look to any job. You can buy small sizes for drawings and photographs or larger ones for paintings.
To purchase a passe-partout, place an order online or visit one of our Moscow stores. We operate a curbside pickup system, but we also offer delivery. If the cost of your order exceeds 5 thousand rubles, we will deliver it within the Moscow Ring Road for free!