DIY daffodils made from paper and sweets. DIY corrugated paper daffodils
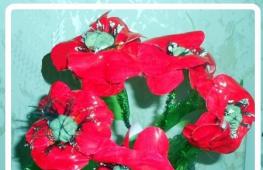
This stunning bouquet will be a wonderful gift for friends and acquaintances. This bouquet lifts the mood well not only on a holiday, but also on a weekday. In addition, such a bouquet will last much longer than fresh flowers.
For work we will need:
- corrugated paper.
- threads.
- scissors.
- glue gun.
- wire.
- cotton wool.
- wrapping paper.
- tweezers.
To make a daffodil, we will need corrugated paper in three colors: white, yellow, green. Let's start working with white paper. We will make petals from it. We cut strips along the fibers 1 cm wide. We cut this strip into rectangles measuring 1x6 cm. This will be one petal. For the daffodil we will need 6 petals.

We take our blank and cut the edges so that we get a petal like this. To do this, we will need to cut off the corners at the top of the petal so that we get an oval pointed petal. And from the bottom, we cut off a little edge, but leave it straight.

Let's start making the center of the flower. To do this, take yellow paper. We cut out a square measuring 10x10 cm. We will do all the work with corrugated paper along the grain.

We bend this square at the top 1 cm along its entire length. This fold will be inside the flower.

Using tweezers, stretch the edges of the square on the fold. We make it so that we get a wavy edge.


We make a depression in the middle of the square with our fingers. The most important thing is that the fold and the recess are on the same side.

We take cotton wool and tear off a piece. Roll it into a ball. This will be the middle of the flower. Instead of cotton wool, you can take foil or round candy.

We place our ball in the recess in the square. Gradually and carefully roll it into a tube. This will be the middle of our flower.


Using nitons, we tie the bottom of the tube so that there is a tail at the bottom and a wavy edge at the top. Carefully straighten its edges. And where the cotton wool ends, we press the wavy edge with our fingers. Squeeze between the cotton wool and the edge.

It's time for the petals. We take the petal and stretch only its edges, without touching the middle. When the entire top has been processed, we proceed to the bottom part. We stretch it slightly in the same way as we will attach it to the base, that is, to the middle. We process all the petals for our flower in this way.

We take the first petal and tie it to the middle using threads. We tie everything tightly so that it does not come undone. We will tie each petal separately.

We tie all the other petals in the same way, in order.


When all the petals are attached, then we straighten each petal. We also correct the middle of the flower. Our flower is almost ready.

It's time for the leaves and green crepe paper. Cut a strip measuring 0.5x10 cm. This will be a blank for the leaf.

We make a narrow, long and pointed sheet. To do this, cut off the edges of the workpiece.

We tie the leaf to the flower itself with threads. The flower itself is ready.

Now we have prepared all the flowers needed for the bouquet. We have 9 of them.

All that remains is to make the stems for our flowers. To do this, take green paper and cut a strip measuring 1x10 cm, cut it across the grain. Stretch it all the way. We take the wire and glue it to the flower with a glue gun. We begin to wrap the stem. Bend the wire so that the flower bends slightly downwards.

Cut a strip of wrapping paper for decoration.

We wrap the bouquet with our triangle so that the folded corners are on the outside. We squeeze the paper on the stem of the bouquet and tie it with threads. The final touch remains, we tie the thread with the prepared strip for decoration. Tie it in a knot and make a bow on top. Our bouquet is all ready.

We all loved to watch how the daffodil blooms, how much joy it brings with its radiance, how much goodness and charm it carries within itself. In this article we will study in detail how to make a daffodil from corrugated paper with your own hands.


Sunny handsome
This work will not take you much time. It’s very interesting to make, so be sure to involve your children in the process, you are guaranteed an interesting pastime. Before work, you must prepare all the necessary materials.
We will need:
- corrugated paper for making a flower bud (white and yellow);
- corrugated paper (green);
- wire (it is necessary to prepare a diameter of 0.3 cm) or thread;
- a piece of wire for making a daffodil peduncle;
- scissors;
- office glue.
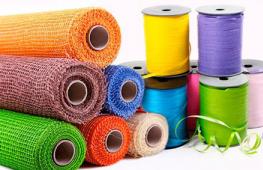
All materials can be purchased at specialized craft stores.

So, let's begin. Take the stem in your hands and carefully wrap it with green crepe paper. Secure with glue. Let's move on to creating the stamens. Fold yellow crepe paper in half. Do this three times and make cuts along the entire length of the workpiece. Lay out the tape and start doing twists. We only need to make one piece, the rest can be cut off. Take our stem and measure three cm from its end, wind the resulting tape. You have the inside of a daffodil.
To create the bowl we will need yellow corrugated paper. Cut a strip out of it, the length of which is 10 cm and the width is 2 cm. Place it in front of you so that a depression is formed in the center. Once you have done this, you can start wrapping the resulting ribbon around the inside of the daffodil.
Take note! In order for the flower to look voluminous and airy, it is necessary to make large folds.
Let's understand the details
Once you have completed the flower, you can use thread to wrap around the bottom of the flower. Extend the base of the flower by opening the pleats. Now you can move on to the petals themselves. Take white paper and cut out a ribbon 2 cm wide. Draw the outline of a petal on it with a bright pencil. Cut it out. For one bud you need to make six petals.
Gently straighten the finished petals and give them a more rounded shape, like a tulip. Attach the petal to the beginning of the bud and secure with glue. Attach the remaining two petals by overlapping each other. The first tier is ready. Make the remaining two “floors” in the same way as the first tier. Secure everything tightly with thread and wrap it with green corrugated paper on top.

Now make a retreat one centimeter from the base of the bud and make a knee of the peduncle. Cut out a petal from white paper and twist it with your finger. Straighten it a little and attach it to the stem using glue. Decorate all unevenness and unsightly “modifications” with green tape. Straighten all attached daffodil petals outward. Cut out three leaves from green paper and glue to the stem. Our daffodil is ready!
Sweet gift
After we have made the version from paper, we can proceed to the sweet “invention”. And if in the first option you managed to get the children to do a craft with difficulty, then in this case, when you mention the word candy, the children will not keep you waiting. In this section we will show you how to make a sweet bouquet with your own hands.
For this master class you will need:
- corrugated paper (green, yellow and white);
- favorite candies;
- wooden toothpicks;
- heat gun;
- scissors;
- tape;
- scotch.
So, if you have prepared everything, then let's get started. First, let's make it clear that your favorite candies are not intended to be eaten during the manufacturing process, they are necessary to create a sweet bouquet. Cut out blanks for the daffodil core from yellow crepe paper. Twist the end of each element. Take white paper and cut out the petals.

Put each petal in order, note that some of them need to be pulled out to make them look natural and more alive. Make leaves for the future flower from green paper. Let's move on to working with sweets (remember the first rule). Carefully place each treat on a toothpick and secure with glue. Heat up the glue gun.

Secure each stick to the core. Next, glue six white petals in a circle. The finishing touches remain: wrap each candy with green tape and attach the buds to the stems. The sweet masterpiece is ready. Showing your imagination, you can make a bouquet of different candies, flowers, and decorate it as your heart desires.

Video on the topic of the article
Thematic selection of videos:
The delicate spring flower narcissus brings joy and inspires hope for the future. This lesson shows how to make a sweet bouquet of daffodils - a wonderful gift for a girl, woman, or sweet lover.
Materials:
- Floral corrugation, white and yellow,
- Crepe paper white, green (or tape and aspidistra,
- Candies, round and small,
- Gerbera wire,
- Skewers 20 cm,
- Red stamp pad,
- Glue stick,
- Scissors,
- Hot gun
- An ordinary paper napkin.

I cut petals from a piece of white corrugation, 30 x 10 cm in size, according to this pattern, where the dimensions are a fold of paper. Yield 19 petals (for three flowers at once + spare petal). Petal width is approximately 3 cm.

These are the kind of curves, but they are completely even and are not needed, so the flowers turn out “more alive”.

This is how we prepare the candy.

From yellow corrugation we cut out a strip of 7 x 7 cm; if the candy is larger, then it is better to take the length 9 cm. We tint the outer edge and both sides to the middle with a pad, wrap the candy tightly, with the tip turned down, twisted up. This is so that the candy can be removed later without damaging the flower.

We cut the wire into three equal parts (about 13 cm each) and bend it as in the photo. We glue it into the bud with a hot gun without touching the candy.

Glue three petals.

And three more between them, in a checkerboard pattern.

We bend the white ones, slightly stretching the edges and stretching the yellow center.

We cut out a piece of 6x6 cm from white crepe paper, fold it 2 cm, stretch it a little and paste over the stem of the flower (the second flower is already ready).

We wind a “bubble” out of a napkin, bend the wire over the “bubble”, insert a skewer and twist it with wire.

Or we glue it with a hot gun, whichever is more convenient for you.

We wrap the stem with tape, not forgetting to insert the aspidistra leaves. If there is none, then you can cut it out of corrugated paper or crepe paper.

The flower is ready...

Or the whole flowerbed?


These are the bouquets we got.


Daffodil made of corrugated paper. Master class with step-by-step photos.
DIY daffodil.
The master class is intended for school-age children, teachers and parents.
Author: Svetlana Nikolaevna Shmykova, teacher at MBDOU - kindergarten for supervision and health care No. 90, Yekaterinburg, Sverdlovsk region
Daffodils made according to this master class can be used to decorate a hall for a holiday, decorate a room, as an attribute for a dance.
Target: Making three-dimensional flowers from corrugated paper.
Tasks:
- Learn how to work with corrugated paper;
- Develop creative abilities, achieve similarities between flowers made with your own hands and real ones;
- Cultivate accuracy in work.
About Narcissus
A flower named Narcissus,
Once upon a time he was a handsome prince
But suddenly he became his own favorite -
Such was the whim of the Goddess.
He admired day and night
With your wonderful reflection.
He didn’t eat, didn’t drink, drove his friends away...
There was only a moment before death.

Goddess to save lives
Turned Narcissus into a flower
(They are gossiping - the nymph begged).
Since then it began to bloom.
The reason was a simple trifle:
He once told the Goddess,
What does she equal from now on?
With its immeasurable beauty.
And he was punished at that very moment,
Goddesses are quick to deal.
Value your mind, value your face,
But don’t get into arguments with the Gods.
Anastav
Artists often turn to the image of this beautiful flower.


Let's try to create a daffodil with our own hands.
We will need:

- crepe (corrugated) paper (very good if fluorescent):
light yellow, pale yellow, orange, green;
- glue stick;
- rigid wire 80cm;
- narrow tape;
- scissors.
Work order:
1. Making stamens.
We measure a 3cm strip from pale yellow paper and cut it across the entire width (3cm x 50cm). We cut the strip in half - these are blanks for 2 stamens. We fold each strip in half and glue it together (we coat one half with glue on the inside). On the narrow side, make a bend of 1.5 cm and twist the strip between your fingers with a flagellum along the entire length.

We do the same with the second strip. In this way we make 4 more stamens.
We collect the stamens in a bundle and wrap them with threads to the wire,

At the end we secure with 1-2 loops.
Lubricate the thickened tips of the stamens with PVA glue and dip them in dried coffee grounds (or ground coffee).

You can simply paint it with gouache.
2. Make the middle of the flower.
From orange (or yellow) paper, a 40cm strip along the length of the roll (40cm x 50cm). We place the paper in front of us so that the grain of the paper is vertical. Coat half with glue, fold in half, iron. Gently stretch the edge along the fold line to a width of 3 cm,

then roll a small roller along this edge with your fingers.

Glue the side edges together. We insert a wire with stamens into the middle of the resulting cylinder, corrugate the lower edge of the cylinder and wrap it tightly with threads. We secure the threads with 1-2 loops.

3. Making petals.
From yellow (or white) paper we cut a strip of 36 cm along the length of the roll. Cut it in half across the grain - we get two blanks 36cm x 25cm. Let's take the first one. We place the paper grain vertically. Coat half with glue,

fold from right to left, smooth.

Cut out the top edge of the petal.

Roll the roller between your fingers along the edge of the petal, starting from the middle.

The petal is ready. We make 5 more of these petals.
4. Attach the petals.
We take 3 petals and place them around the center of the flower, corrugating the lower edge.

We wrap it with threads, secure it with 1-2 loops, and then secure it with tape.
Between the first petals we place the second three petals.

We fix it in the same way as the first ones.
5. Decorate the stem and leaves.
Along the length of the roll, cut a strip 3cm wide and at least 60cm long. We coat it with glue and wrap it first around the place where the petals are held together - you get a flower cup,

and then the wire - the stem.
Along the width of the roll, cut two or three strips 4cm wide, fold them in half and glue them. Cut out sword-shaped leaves

And glue them to the stem, twisting the bottom of the leaf around it.

The flower is ready!

You can put a bouquet.

You can “grow” daffodils against the wall.

Can be attached to the wall.
Corrugated paper is a great material for creating realistic, beautiful, vibrant colors. Its many types allow you to create bouquets and compositions of different shapes, textures and any color scheme. Such crafts perfectly decorate both ordinary and festive interiors, but you can please your loved ones with a bouquet of paper flowers.
Today we present to your attention a photo tutorial on how to create DIY corrugated paper daffodils.
For your own narcissus flower, prepare the following materials:

- white and yellow corrugated (creped) paper to create a daffodil bud;
- green corrugated (creped) paper;
- threads or very thin wire;
- a piece of wire to create a daffodil peduncle;
- scissors;
- glue stick.
How to make a daffodil from corrugated paper with your own hands?
So, to give the stem a realistic and complete look, we wrap it with green crepe tape.

You can also use a special tape. This is what the stem turned out to be.


We make these cuts throughout the entire workpiece.

Then we lay out the tape and begin twisting the strips.

You should end up with strings like this. There is no need to twist the strips of the entire ribbon; it is enough to make 14-15 threads and cut off the excess ribbon.

The remainder can be used when creating the next daffodil, so don’t rush to throw it away.
Now, in order to properly fix the resulting threads on the stem, we apply glue to its inner side, and only then begin to wind it around the tip of the stem.
 The inside of the daffodil is ready!


We stretch the strip so that a depression is formed in the middle, and small flounces along the edge.

We begin to wrap the calyx blank around the stamens.

When winding the ribbon, we make large folds to make the base wavy and voluminous.

We tighten the lower part of the crown with a thread, which will open the crown a little, and the folds made will become even more expressive.

Then we squeeze the base of the flower with our fingers. Now the daffodil cup has become more realistic.

We cut out narcissus petals from white paper. Cut a strip 2 cm wide from a roll of white crepe or corrugated paper.

We draw the outline of the petal on top.

We cut out the blanks along the contour.

To create one bud you will need six petals.
True daffodil petals are slightly convex in shape. We add it to our cut-out blanks.

Attach the first petal using a thread.


The first tier of petals is ready. In the same way, attach the petals of the second, lower tier.

Treat the lower part of the attached parts with thread,

and then treat it with crepe tape.

Step back about a centimeter from the base of the petals and create a “knee” of the peduncle.

We create the film wire, which is located under the “knee,” from a piece of white crepe paper. We cut out a leaf like this, sharp in shape,

twist it with your fingers,

straighten it and glue it to the stem with glue.

We decorate its lower part with green crepe ribbon.
We straighten the daffodil petals, bending each petal outward.

Narcissus leaves are flat, narrow in shape. We cut them out of crepe or colored paper in a pale green tone.

Three petals are more than enough for one peduncle. Glue the leaves to the bottom of the stem.

That's it, the corrugated paper daffodil is made with your own hands!

Paper daffodils go well with other spring flowers - tulips, muscari or hyacinths.